I can pull the orange camera canopy off this quad and reach the stack without touching the motors.
The January 1 photos show the frame with the canopy off. On January 5 the camera was back in place and the battery sat underneath.
Frame and motor mounts
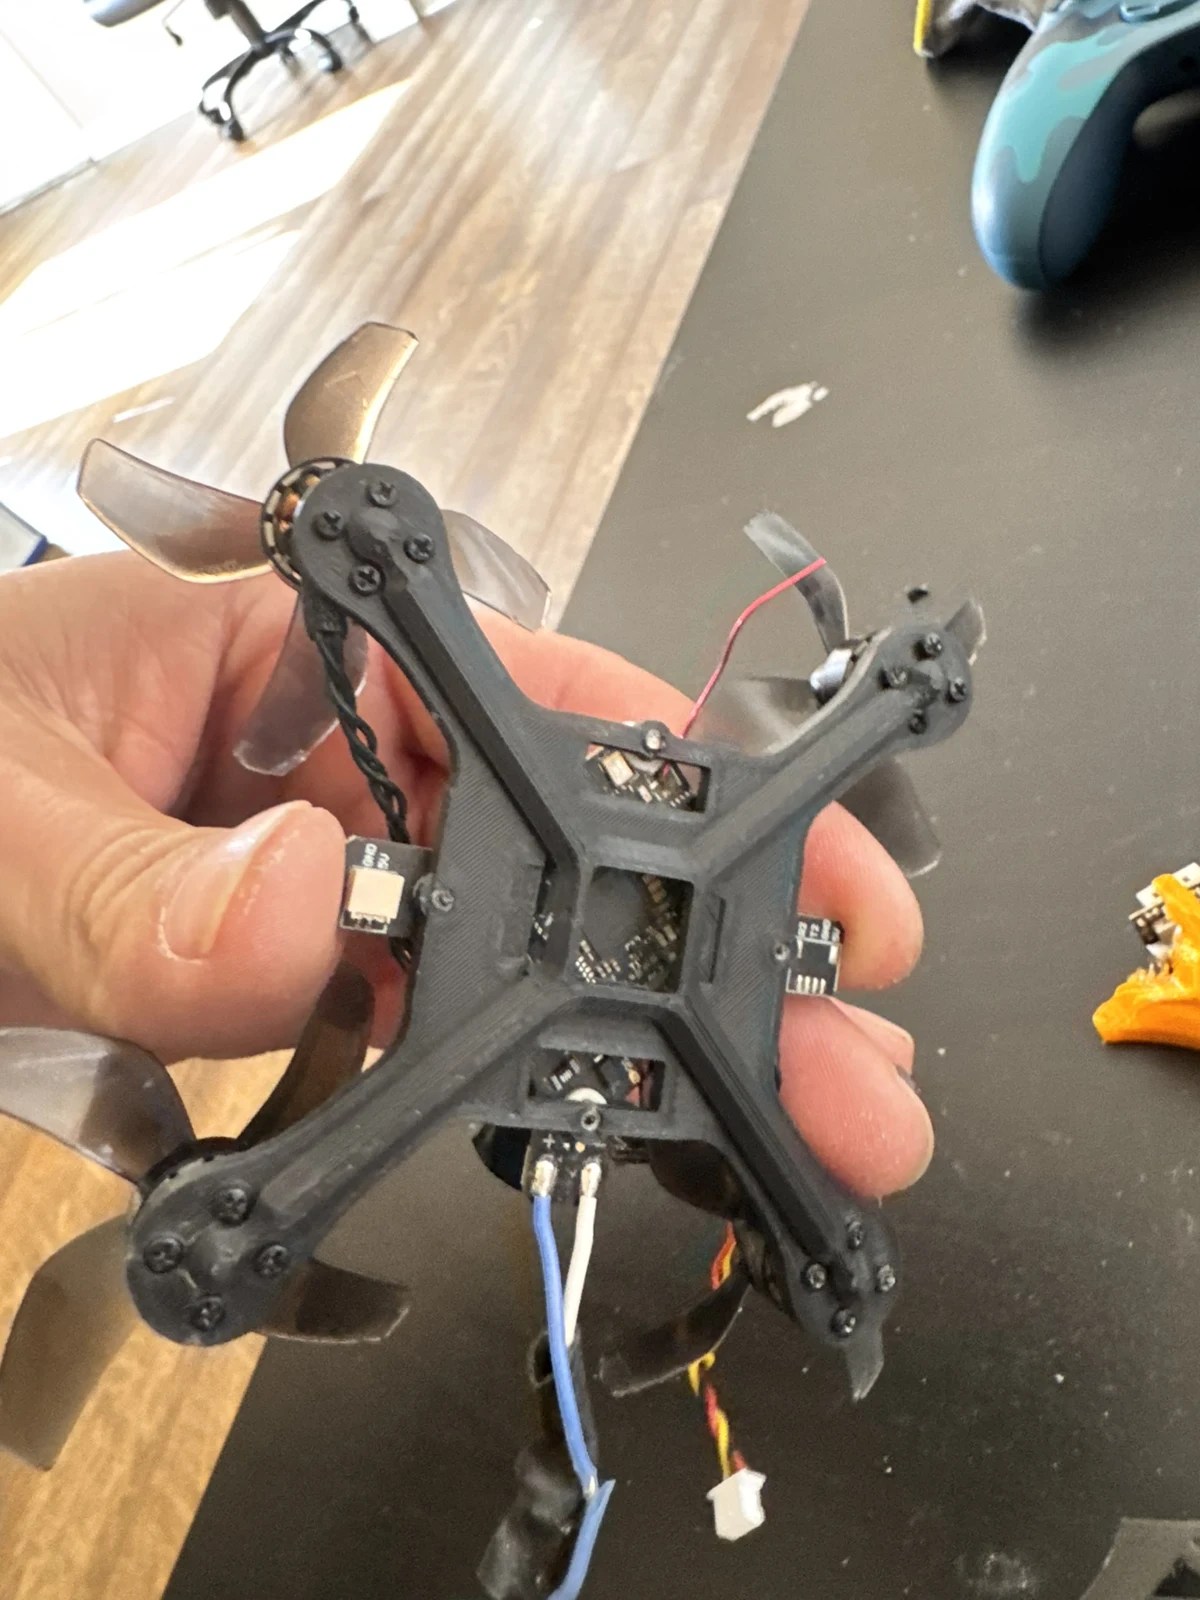
The ribs run from the motor mounts toward the center stack. They add depth to the arms without filling the entire underside with material.
Motor torque and thrust go into the arm at each mount. If an arm flexes, some of that motion reaches the gyro at the center. I don’t have a vibration trace for this frame.
Opening the center
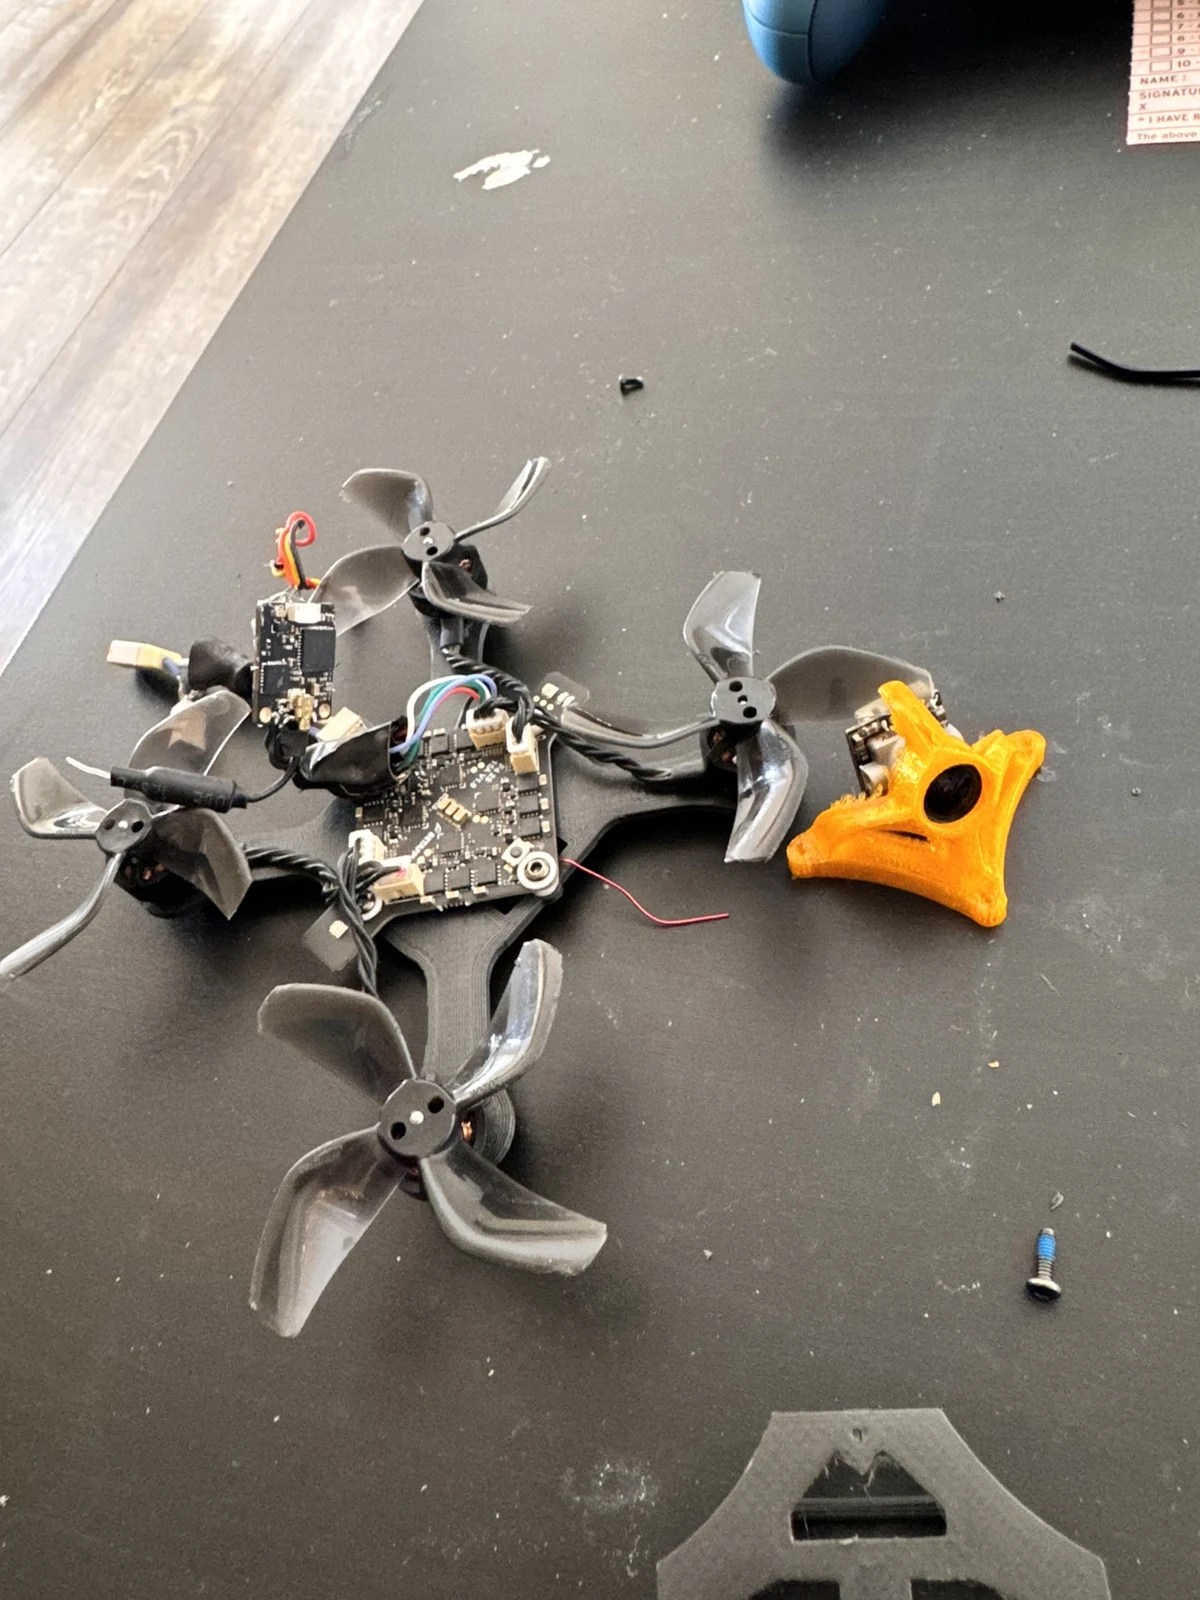
With the canopy off, I can reach the motor connectors, board mounts, and camera wiring.
There’s very little room between the stack and the prop arcs. The leads need enough slack to lift the canopy without leaving a loop that can move into a prop.
The camera canopy
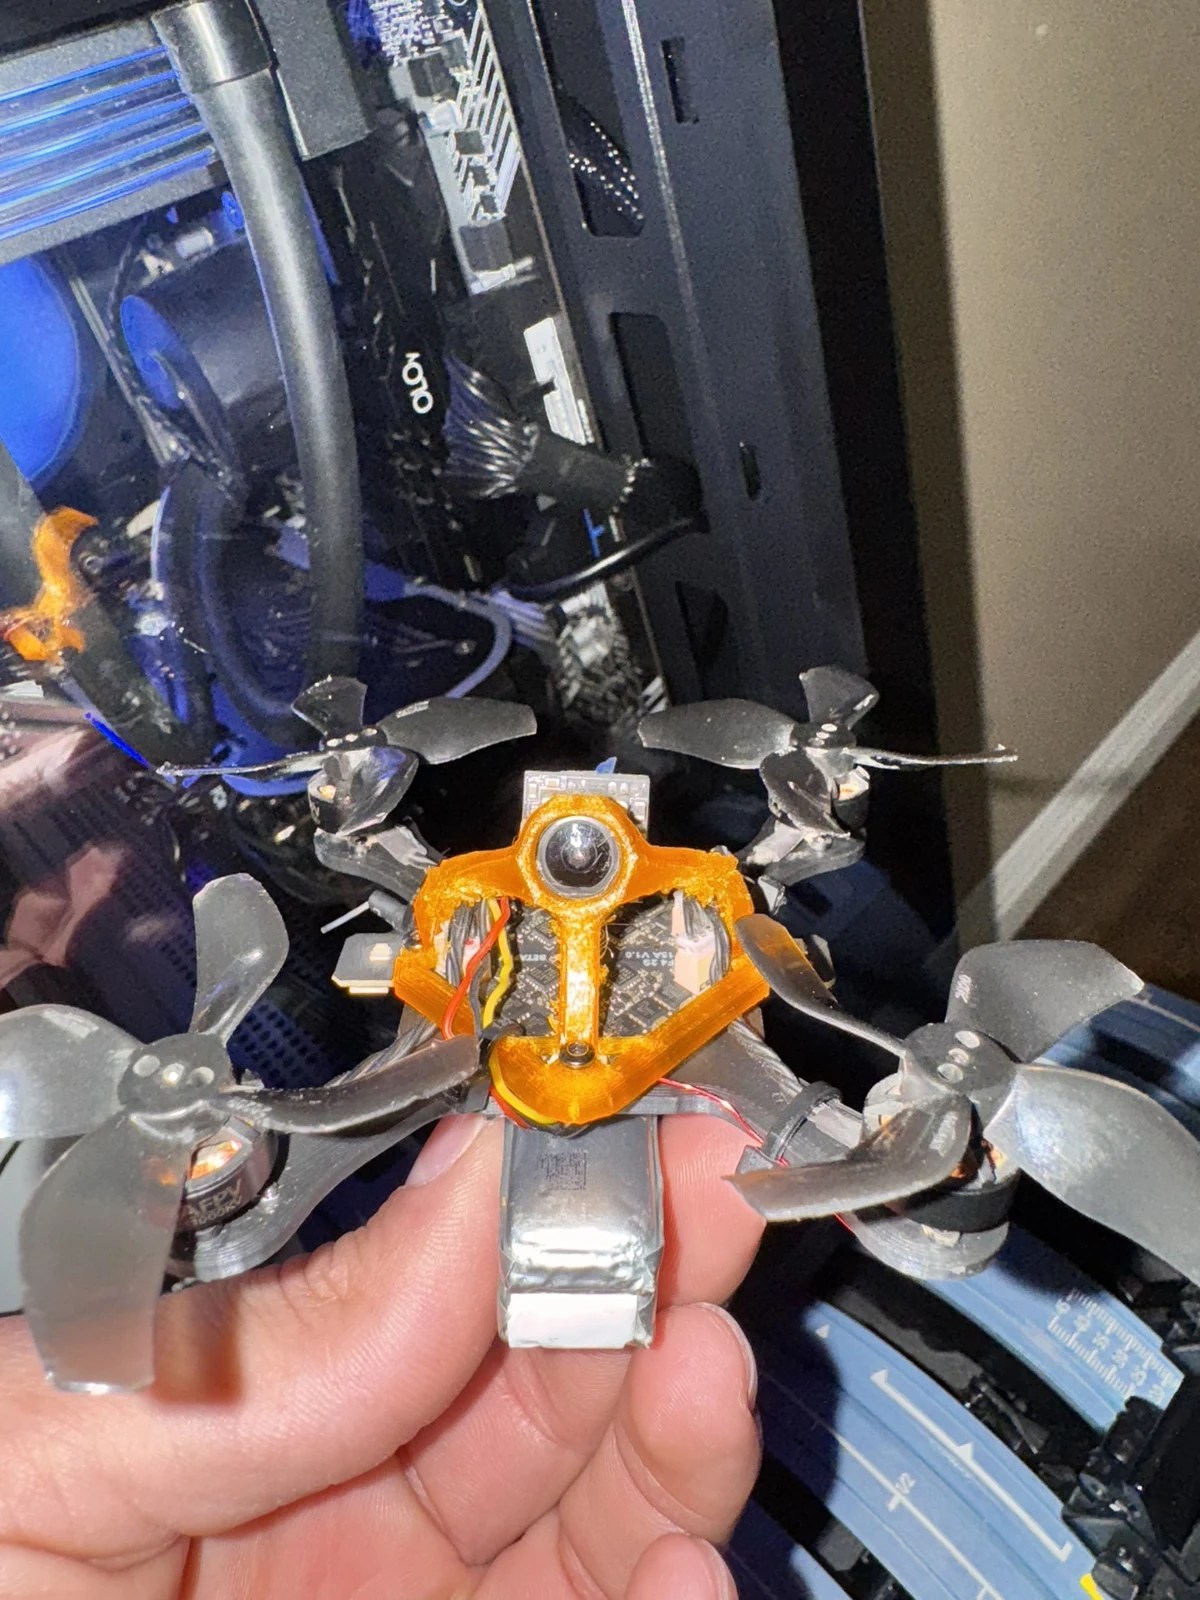
The orange print sets the camera angle and leaves the sides of the stack open.
I can change the lens angle by changing the canopy without reprinting the frame.
The pack sits below the frame, close to the motor wires. I check wire clearance with the pack strapped in, since that changes where the leads sit.
For the larger build, see my quad with 10 inch props.

